10 Polka Dot Nail art ideas

Today I thought I’d have a look back at some of my previous manis using a dotting tool. Of course you don’t have to use a traditional nail art dotting tool, to do something similar you could use the head of a pin, the end of a hair grip (which is what I started with years ago), a tooth pick or the blunt end of a pen, they are all easy to use and you could even use a combination of all of them to create different sized dots.

Alternatively, if you’d like to go for it and get yourself some dotting tools you can pick them up from Pound stores, Sallys or sometimes Superdrug, Claires accessories and Boots carry them.

So here we go:

Starting with super simple but effective lilac and mauve dots finished with a matte topcoat.


Autumn inspired dotticure


So easy, yet so strikingly spotted


Dotted flowers


Jelly dotticure


Easy and classy black on matte gold


Fun Ladybird nails


A dot within a dot & glitter – a classic combo


A dotted fade


Daring pink & orange colour combo – I love it!


Please let me know which you like best. Have a good week!

‘Summer Sprinkles’ Flower Nails

Light Pink – China Glaze ‘Diva Bridge’

Dark Pink – Leighton Denny ‘Pink Promenade’

Green – Essie ‘Navigate Her’

Lilac – Models Own ‘Lilac Sheen’

Grey – Models Own ‘Lunar Grey’

Yellow – Nails Inc ‘Spitalfields’

Daisy Dreams Manicure

Hi, I hope that you had a good weekend?

Today I have a summery mani featuring metal silver daisies. Now I’m not entirely sure where I got these I’m afraid to say so can’t give you a link, but the polishes used are:

Pink – China Glaze ‘Diva Bridge’

Grey – Models Own ‘Lunar Grey’

The daisies are stuck on using Gem Tack which is my go to glue.

Barry M Lolly Gloss Nail Paint

Just a quickie today to show how I used Barry M ‘Lolly Gloss’ range.

lolly-gloss-nails

The four colours available are translucent bright colours with a sheer jelly gloss finish. They are also scented with fruity scents so that adds to the fun of these. The colours are as follows:

Cherry Drop

Orange Fizz

Pink Candy

Purple Pop

I have used three coats adding white dots in different places and on different coats to achieve this effect

They are currently available here on a – Buy one, get a second half price deal.

ILNP Shelfie

Following on from my previous post, I thought I’d do a shelfie of my ILNP collection.

ilnp-shelfie

ILNP is by far my favourite brand at the moment, I love everything about it – It is perfectly formulated and glides on a treat, it’s self levelling and the colours are to die for. As someone with a degree in packaging design, I LOVE the bottle & the black box. The thickness and shape of the bottle glass, the rubberised lid and the subtle black logo all work together to tick all of the boxes of both function & form.

I can generally wear these for a week or sometimes more without any sign of chipping, although, I rarely get chance to keep polish on that long.

The colours are as follows (in no particular order):

‘Ten Fold’, ‘Mega’, ‘Music Box’, ‘My Private Rainbow’, ‘Peri Me’, ‘Home Sweet Home’, ‘Daisy Jane’, ‘Top Down’, ‘Fall Semester’, ‘Jello Shot’, ‘I See You’, ‘Purple Plasma’, ‘Bikini Bottoms’, ‘Interstellar’, ‘Shoreline’, ‘Champagne Blush’, ‘Kings & Queens’, ‘Lilac Bridges’, ‘Poetry’ & ‘Clockwork’

light-ilnp

dark-ilnp

If you are tired of mainstream polish brands and want to try something a bit different, then I urge you to invest in these beauties.

Picture Polish bright striped Nails

Over the weekend, I was very lucky to meet up with an old friend who was visiting from Australia, I know that she has so many people to see while here, so it meant a lot that I got to catch up with her and her other half plus – she very kindly agreed to bring over with her a small order I placed with piCture pOlish meaning they were a lot cheaper than buying them in this country – how amazing is that! She also bought me some glitters over, but that’s for another day!

I got five polishes and ‘Peel Off Glitter Base’, I have used four of the lovely polishes here in this mani.

Now all of the polish consistencies are on the thicker side (but completely manageable), and cover in two coats. The stripes are hand painted using a very fine brush.

The colours used are:

Lilac – Eerie

Sky Blue – Salt Water

Green – Honey Moon

Raspberry – Shocked

Picture Polish stripes

Then topped off by my fave top coat Seche Vite.

Glam Polish – ‘Happy Birthday Mr President’

The sun has got his hat on, hip hip hip hooray! If any of you lovelies are in the U.K. I hope that you are getting chance to enjoy the sunshine, isn’t it glorious! although some would say too hot. I can’t quite believe that it was still 22 degrees at 2.00 this morning!

Todays polish was released earlier this year in March and is from the 9 piece ‘Love Marilyn’ Collection from Australian indie brand – Glam Polish. Each polish is Marilyn related in some way and here we have ‘Happy Birthday Mr President‘. When I saw a swatch of this stunning pink polish on Instagram a while back I just had to try it! When it arrived I had to remove my existing perfectly good manicure and put it on straight away, it is jam packed with holo glitter, so much so that you could almost get away with just one coat, but here I have two. It glided on really well, dried quickly and I finished with top coat. The sun was brightly shining and so I went over to the window and was just blown away by the sparkle almost smiling back at me.

Glam Happy Birthday Mr President

The cost of this was £9.50 but my supplier no longer has it in stock so it would be silly giving you a link. However here is a link to the companies website.

Right, I’m off to dip my toes in the paddling pool… Ta ta for now!

Sally Hansen Miracle Gel

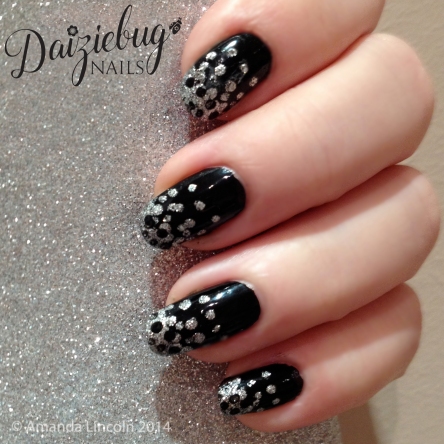
Up for review today is the Sally Hansen Miracle Gel. I was sent a couple of colours and the top coat to try out and review.

Saly Hansen Prod shot 2

The colours I was sent were ‘120 Bare to Dare’ a gorgeous cream nude and ‘400 Smartease’ a girly pink. To be honest the pink isn’t really my sort of colour but I loved the cream nude. I applied 2 coats of the pink and 3 of the cream for full coverage, the first coat was streaky but do persist, as you can see it resulted in a Gel “look” manicure.

Sally Hansen 2 colours

I applied it thinking it would dry pretty fast as I had seen reviews on Amazon saying so, however my experience wasn’t like that at all – I spent around 15 mins waiting for it to dry after applying the topcoat but it was still tacky, I then had to drive somewhere, I got into the car and put on my seatbelt really carefully and drove for a further 15 mins in bright sunlight and it was a warm day so presumed it would dry in that time but it was still pliable, I then had to pick up my son and unfortunately it still wasn’t dry enough and it got dented so I had to start again later. I found that in the end I was too busy to sit around waiting for it to dry completely so I used my Seche Vite fast drying top coat over the top which helped to speed up the drying time a little, however it was still not rock hard but pliable for a while, but it helped. This is the official reasoning behind this technology direct from Sally Hansen:

“The advanced Color Coat and Top Coat formulas contain an oligomer, and the Top Coat also contains a photoinitiator. The photoinitiator in the Top Coat formula reticulates with the oligomer contained in the Color Coat, thus curing the formula without the need of an LED/UV light. As the manicure cures over time, it becomes more durable due to the increased hardness of the film. So LED/UV lamp curing is not necessary, only natural light.”

S.H. Bare Dare

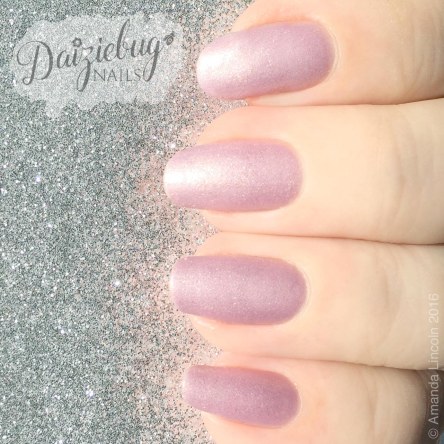
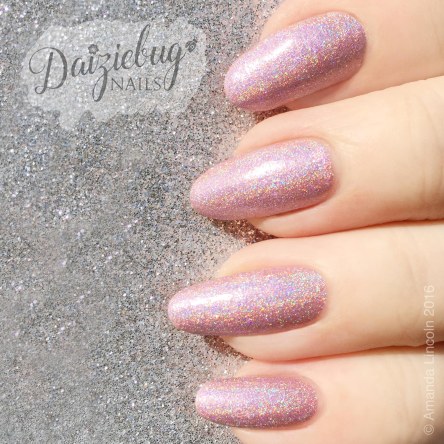
I’m not that keen on the colours which the first photo shows, this is a more accurate image of ‘120 Bare to Dare’

As for claim that this product lasts longer than the average polish, I tend to agree. I personally had the 120 on for seven days (before I had to take it off because I was going into hospital) and a friend who works in catering also tested it out for me, polish only usually lasts one to two days on her but she got five out of this. I am pretty sure that you could get more time out of it if you were gentle on your nails and don’t have a lifestyle which puts your nails under a lot of strain all of the time. So overall in conclusion, I’d say, if you have time to let the product dry properly e.g. while you are watching a film or something then it is definitely worth buying, also using a fast dry top coat over it seemed to help so that is worth keeping in mind and looking after your nails as best as possible goes without saying.

I’d love to hear from anyone who has tried it – how many days did you get?

*Kindly note that the seller has provided me with a free sample of this product in exchange for an unbiased review

Introducing the new Zoya UltraBrites Collection

image003

Introducing ULTRABRITES* by ZOYA!

Say goodbye to annoying, hard-to-apply, streaky neons. In keeping with their brand philosophy to be The HEALTHY NEW COLOR of FASHION, Zoya’s revolutionary new ULTRABRITES formula delivers the brightest neons using the latest environmentally and cosmetically approved pigments in a highly stable formula.

That’s right! All of the BRIGHT with none of the industrial yuck and commonly associated with colors of this kind (and banned worldwide).

ZOYA ULTRABRITES can be worn alone in their natural satin finish or topped with ZOYA ARMOR topcoat or Zoya Naked ManicureTM Glossy Seal for a high shine finish. Apply over white nail polish (Zoya Purity) to add extra pop to your color!

  • Cana – ZP865: Zoya Cana is a bright neon fuchsia cream.
  • Bisca – ZP866: Zoya Bisca is a hot pink neon cream.
  • Erza – ZP867: Zoya Erza is a sunny red neon cream
  • Evergreen – ZP868: Zoya Evergreen is an electric green neon cream.
  • Juvia – ZP869: Zoya Juvia is a summery teal neon cream.
  • Mirajane – ZP870: Zoya Mirajane is a classic navy neon cream.

*Formulated without formaldehyde, formaldehyde resin, toluene, dibutyl phthalate, camphor, THTP, parabens, xylene, ethyl tosylamide and lead.

image007